
By Admin on 19 September 2023
Object detection is an approach in computer vision to predict bounding boxes around instances of interest in an image. In addition to the localization of objects, we may want to predict some additional properties related to the detected objects, or to the whole image. In the case of the first, bounding box related task, we may want to predict some additional attribute of an object or learn more complex relations between detected objects. In the case of tasks on the image level, we may want to predict the number of instances in an image or classify the image in some way.
Here, we will talk about custom tasks related to the predicted bounding boxes. For each bounding box, we will add another neural network stream for predicting additional attributes. This stream in the model will have an additional sigmoid if an object has multiple attributes, or softmax activation if the attribute is unique for each instance.
During the training of the model, it is common to match predicted bounding boxes to the ground truth objects and optimize only positive pairs of matching. Our approach for the prediction of the additional attribute will be similar. Model will learn attributes only of bounding boxes successfully matched based on their location in the image.
For the purpose of this tutorial, we will demonstrate how to:
MMDetection library by OpenMMLab consists of well documented and systematically maintained PyTorch code, with a special emphasis on modularity. This modularity enables us to easily implement and register anything needed for training a model, such as model head, dataset, data transformation, loss, optimizer, etc.
Additionally, MMdetection provides the implementation of more than 70 models for object detection, instance and panoptic segmentation, which can be easily deployed through the MMDeploy framework, also developed by OpenMMLab. Also, training and experimenting with different models in MMDetection is very simple due to the advanced system of configuration files from which you can include any of the modules mentioned earlier with only a few lines of code.
However, the MMDetection framework does not provide a simple incorporation of a custom task to the detection model. Therefore, in this blog post, we will provide a step-by-step tutorial of how to include the prediction of an additional task to the MMDetection framework. Code that follows this tutorial is available in our repo.
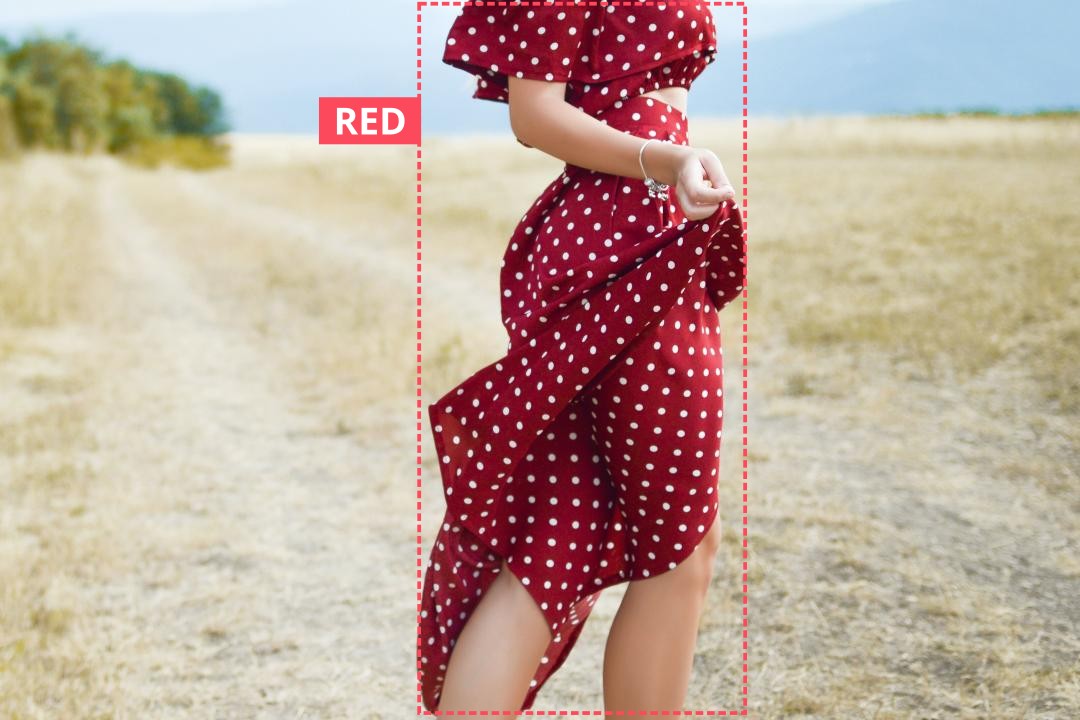
The primary task we want to solve in this tutorial is to detect the clothing in an image. More precisely, we want to find a bounding box around an item and say what kind of clothing it is. As an additional task, we want to predict the color of that item.
For that purpose of this tutorial, we constructed a small dataset of 4 images from Unsplash with clothing items on them. Items can be either a dress or a shirt. Colors between which we want to predict are red and blue.

We prepared the annotations in the COCO format, which is often used in the MMDetection framework for many detection models. Instances in the COCO annotation JSON file are represented by a dictionary with the following appearance:
{
    "segmentation": [
        [
            760,
            1490,
            760,
            2499,
            1860,
            2499,
            1860,
            1490
        ]
    ],
    "area": 1109900,
    "iscrowd": 0,
    "image_id": null,
    "bbox": [
        760,
        1490,
        1100,
        1009
    ],
    "category_id": 1,
    "id": 1000,
    "color": 0
}Code language: JSON / JSON with Comments (json)
Here, important keys for us are "bbox" which represents a bounding box in the (x0, y0, width, height) format, "category_id" which indicates the base category, and "color" which denotes the color of the instance for our custom MMDetection task.
Also, if an annotated instance has more than one color, we could pass a list of indices under the key "color". In this tutorial, all images will have only one instance and that instance will only have one color. However, in practice, we could use the same approach if we have more than one instance in the image and if instances have more than one color. It is important to note that we inserted the "color" key, and that it is not present in the standard COCO annotations.
The next thing we have to do is create and register a dataset class. MMDetection enables us to do that with only a few lines of code:
from mmdet.datasets.builder import DATASETS

@DATASETS.register_module()
class ColorFashionDataset(CocoDataset):
    ...Code language: CSS (css)
In the dataset class, we have to modify the CocoDataset._parse_ann_info method, which reads and parses annotations from JSON files. The following code snippet enables reading of the color annotations:
def _parse_ann_info(self, img_info, ann_info):
     annotations = super()._parse_ann_info(img_info, ann_info)

     color_anns = []
     for ann in ann_info:
         color_anns.append(ann["color"])

     annotations["colors"] = color_anns
     return annotationsCode language: JavaScript (javascript)
After we register any new class in MMDetection, like our new dataset class, it is necessary to specify it in the custom_imports part of the config file. We simply do it by the following code:
custom_imports = dict(
    imports=['color_tagging.datasets.color_fashion_dataset', ...]
)Code language: JavaScript (javascript)The next important classes we have to modify are the annotation loader, which loads annotations from the dataset and the formatter classes, and makes the final preparations to the data for the forward pass through the model.
In the loader class, we inherit from the MMDetection LoadAnnotations class:
from mmdet.datasets.builder import PIPELINES
from mmdet.datasets.pipelines.loading import LoadAnnotations


@PIPELINES.register_module()
class LoadColorAnnotations(LoadAnnotations):
    ...Code language: CSS (css)
After that, we add the _load_colors method that loads color from the dataset annotation, and we call it in the LoadColorAnnotations.__call__ method:
def __call__(self, results):
     results = super().__call__(results)

     if self.with_colors:
         results = self._load_colors(results)

     return resultsCode language: PHP (php)
For the formatter class, we have to inherit from the MMDetection DefaultFormatBundle class:
from mmdet.datasets.builder import PIPELINES
from mmdet.datasets.pipelines.formatting import to_tensor, DefaultFormatBundle


@PIPELINES.register_module()
class ModifiedDefaultFormatBundle(DefaultFormatBundle):
    ...Code language: CSS (css)
After that, we have to convert color annotations to torch.tensor and pack them in mmcv.DataContainer from which models in MMDetection expect data.
def __call__(self, results):
    results = super().__call__(results)

    keys = ['gt_colors']

    for key in keys:
        if key not in results:
            continue
        results[key] = DC(to_tensor(results[key]))

    return resultsCode language: JavaScript (javascript)
Now, the pipeline classes are prepared, and we can include them in our data pipeline in the config file:
train_pipeline = [
    dict(type='LoadImageFromFile'),
    dict(type='LoadColorAnnotations', with_bbox=True, with_colors=True),
    dict(type='Resize', img_scale=(1333, 800), keep_ratio=True),
    dict(type='RandomFlip', flip_ratio=0.5),
    dict(type='RandomShift', shift_ratio=0.5, max_shift_px=32),
    dict(type='Normalize', **img_norm_cfg),
    dict(type='Pad', size_divisor=32),
    dict(type='ModifiedDefaultFormatBundle'),
    dict(type='Collect', keys=['img', 'gt_bboxes', 'gt_labels', 'gt_colors'])
]Code language: PHP (php)After we have created the dataset class and modified the pipeline, we come to the most important part of adding a custom task to the MMDetection framework: implementation of the model.
MMDetections modularity enables us to modify and implement models in many ways. Thus, we can implement another component of the model, such as backbone, neck or head, and attach it to any desired feature map in the model.
The model we use as a foundation in this tutorial is a detection model YOLOF. The authors of the YOLOF model highlight the key improvements the model brings to the community:
“Based on the simple and efficient solution, we present You Only Look One-level Feature (YOLOF). In our method, two key components, Dilated Encoder and Uniform Matching, are proposed and bring considerable improvements.”
We will modify the existing MMDetection implementation of the YOLOF model to solve our additional detection task. The key modification will happen in the YOLOF head, where we will add an additional stream that handles the new MMDetection task of classifying color.
Adaptation of the model class
First of all, we have to inherit from the MMDetection YOLOF model:
from mmdet.models.builder import DETECTORS
from mmdet.models.detectors.yolof import YOLOF

@DETECTORS.register_module()
class ColorFashionModel(YOLOF):
    ...Code language: CSS (css)
This new model class requires only two small changes to handle the new task: First, in the forward_train method, we have to pass the color annotations (gt_color variable) to the model head forward_train method:
<strong>def</strong> <strong>forward_train</strong>(self, img, img_metas, gt_bboxes, gt_labels, gt_colors,
                  gt_bboxes_ignore<strong>=</strong>None):
    <strong>...</strong>
    losses <strong>=</strong> self<strong>.</strong>bbox_head<strong>.</strong>forward_train(x, img_metas, gt_bboxes,
                                          gt_labels, gt_colors,
                                          gt_bboxes_ignore)
    <strong>return</strong> lossesCode language: HTML, XML (xml)
Second, we have to customize a simple_test method, which processes results from the head during the inference time of the model. Here, we pack the color prediction data into a new dictionary, and we append it to the results list holding results for images in the test dataset:
def simple_test(self, img, img_metas, rescale=False):
    ...
    feat = self.extract_feat(img)
    results_list = self.bbox_head.simple_test(
        feat, img_metas, rescale=rescale)

    bbox_results = []
    for det_bboxes, det_labels, det_colors in results_list:
        bbox_res = bbox2result(det_bboxes, det_labels,
                            self.bbox_head.num_classes)

        color_res = {
            "det_bboxes": det_bboxes.cpu().detach().numpy(),
            "det_colors": det_colors.cpu().detach().numpy()
        }
        bbox_results.append((bbox_res, color_res))

    return bbox_resultsCode language: PHP (php)
To enable MMDetection to handle this output format, we have to adjust the mmdet.apis.test script, which is run during the test time. In this script, we simply check if the output consists of our dictionary from the simple_test method:
color_mode = False
if isinstance(result[0], tuple) and isinstance(result[0][1], dict):
    color_mode = TrueCode language: PHP (php)
After that, we use this information to correctly post-process data from the model, and not to confuse the other functionalities of the MMDetection framework:
<strong>if</strong> isinstance(result[0], tuple) <strong>and</strong> <strong>not</strong> color_mode:
    result <strong>=</strong> [(bbox_results, encode_mask_results(mask_results))
              <strong>for</strong> bbox_results, mask_results <strong>in</strong> result]Code language: HTML, XML (xml)
We can simply include those changes of the MMDetection code to our environment by executing the following script:
import shutil

from mmdet.apis import test

print(f"Replacing {test.__file__} with fixes/test.py")
shutil.copy("fixes/test.py", test.__file__)Code language: JavaScript (javascript)As we pointed out before, the main changes happen in the YOLOF head class. Here, we have to add new layers to the model that predict colors, implement the models forward pass, and then revise methods that calculate the loss and handle the model inference time predictions.
Like before, we inherit from the MMDetection YOLOF head class and add new variables to the __init__ method that we need to solve our custom task:
from mmdet.models.dense_heads.yolof_head import YOLOFHead, levels_to_images
from mmdet.models.builder import HEADS, build_loss
...

@HEADS.register_module()
class ColorFashionHead(YOLOFHead):
    def __init__(self,
                 num_classes,
                 num_colors,
                 in_channels,
                 num_cls_convs=2,
                 num_reg_convs=4,
                 num_col_convs=2,
                 loss_col=dict(
                    type='CrossEntropyLoss',
                    use_sigmoid=False,
                    reduction='mean',
                    loss_weight=1.0
                ),
        ...Code language: CSS (css)
Those new variables are:
num_colors (number of colors that we predict)num_col_convs (number of stacked convolutions for color prediction)loss_col (loss that we use).In the __init__ method, we set the class instance variables and initialize layers relevant for color prediction:
  self.num_colors = num_colors
    self.loss_col = build_loss(loss_col)
    self.num_col_convs = num_col_convs
    self.use_sigmoid_col = loss_col.get('use_sigmoid', False)
    # If we use loss that requires softmax (cross entropy loss),
    # then we consider the background as an additional class.
    if self.use_sigmoid_col:
        self.col_out_channels = num_colors
    else:
        self.col_out_channels = num_colors + 1

    self._init_col_layers()Code language: PHP (php)
The method that initializes color prediction layers stacks a desired number of convolutions in the following way:
def _init_col_layers(self):
    col_subnet = []
    for i in range(self.num_col_convs):
        col_subnet.append(
            ConvModule(
                self.in_channels,
                self.in_channels,
                kernel_size=3,
                padding=1,
                norm_cfg=self.norm_cfg))
    self.col_subnet = nn.Sequential(*col_subnet)
    self.col_pred = nn.Conv2d(
        self.in_channels,
        self.num_base_priors * self.col_out_channels,
        kernel_size=3,
        stride=1,
        padding=1
    )Code language: PHP (php)
We attach the initialized color layers to the model neck, parallel to the convolution layers that predict bounding boxes and their main classes. We can imagine that in this way, we create a separate stream in the model head that handles the custom MMDetection task. To achieve this, we change the forward_single method, where previously initialized convolution layers are applied to features extracted from the neck of the model:
def forward_single(self, feature):
    normalized_cls_score, bbox_reg = super().forward_single(feature)
    col_score = self.col_pred(self.col_subnet(feature))

return normalized_cls_score, bbox_reg, col_scoreCode language: PHP (php)Now, we are ready to implement the loss method of our head. We copy most of the code in our loss method from a loss method of a parent class, and follow transformations of predictions for base classes held in the variable cls_scores. Thus, we adjust another head class method, get_targets, to return ground truth color labels and weights for the calculation of the loss (batch_color and batch_color_weights variables). After that, we calculate the loss.
def loss(self, cls_scores, bbox_preds, col_scores, gt_bboxes, gt_labels,
         gt_colors, img_metas, gt_bboxes_ignore=None):
    ...
    label_channels = self.cls_out_channels if self.use_sigmoid_cls else 1
    cls_reg_targets = self.get_targets(
        cls_scores_list,
        bbox_preds_list,
        anchor_list,
        valid_flag_list,
        gt_bboxes,
        img_metas,
        gt_bboxes_ignore_list=gt_bboxes_ignore,
        gt_labels_list=gt_labels,
        gt_colors_list=gt_colors,
        label_channels=label_channels)

    (batch_labels, batch_label_weights, batch_color, batch_color_weights,
        num_total_pos, num_total_neg, batch_bbox_weights,
        batch_pos_predicted_boxes, batch_target_boxes) = cls_reg_targets
    ...
    flatten_colors = batch_colors.reshape(-1)
    batch_color_weights = batch_color_weights.reshape(-1)
    col_score = col_scores[0].permute(0, 2, 3,1).reshape(-1, self.col_out_channels)
    ...
    # color classification loss
    loss_col = self.loss_col(
        col_score,
        flatten_colors,
        batch_color_weights,
        avg_factor=num_total_samples)

    ...
    return dict(loss_cls=loss_cls, loss_col=loss_col, loss_bbox=loss_bbox)Code language: PHP (php)
Method get_targets that we mentioned earlier simply applies another method, _get_target_single, to every image in the batch. For that reason, in get_targets we add color prediction variables in the same way that variables for class prediction are already presented.
The biggest adjustment of the model to handle color predictions occurs in the _get_target_single method:
def _get_targets_single(
        self, bbox_preds, flat_anchors, valid_flags,
        gt_bboxes, gt_bboxes_ignore, gt_labels, gt_colors,
        Img_meta, label_channels=1, unmap_outputs=True):
    ...
    assign_result = self.assigner.assign(
        decoder_bbox_preds, anchors, gt_bboxes, gt_bboxes_ignore,
        None if self.sampling else gt_labels)

    ...
    colors = anchors.new_full((num_valid_anchors, ), self.num_colors,
                              dtype=torch.long)
    color_weights = anchors.new_zeros(num_valid_anchors, dtype=torch.float)
    ...
    if len(pos_inds) > 0:
        if gt_colors is None:
            colors[pos_inds] = 0
        else:
            colors[pos_inds] = gt_colors[
                sampling_result.pos_assigned_gt_inds]
        if self.train_cfg.pos_weight <= 0:
            color_weights[pos_inds] = 1.0
        else:
            color_weights[pos_inds] = self.train_cfg.pos_weight
    ...

    return (labels, label_weights, colors, color_weights,  pos_inds,
            neg_inds, sampling_result, pos_bbox_weights,
            pos_predicted_boxes, pos_target_boxes)Code language: PHP (php)
In this method, we assign predicted bounding boxes to the ground truth bounding boxes. Based on this assignment, we construct the target tensor and target weights for our color loss. Then, we pass those new tensors back to the loss method.
The method of the head responsible for predicting bounding boxes during the inference time is get_bboxes. In this method, we follow transformations of class predictions and apply _get_bboxes_single to each image in batch:
def get_bboxes(self,
               cls_scores,
               bbox_preds,
               col_scores,
               score_factors=None,
               img_metas=None,
               cfg=None,
               rescale=False,
               with_nms=True,
               **kwargs):
    ...
    result_list = []
    for img_id in range(len(img_metas)):
        ...
        col_score_list = select_single_mlvl(col_scores, img_id)
        ...
        results = self._get_bboxes_single(cls_score_list, bbox_pred_list,
                                        col_score_list,
        ...
        result_list.append(results)
    return result_listCode language: PHP (php)
In the method _get_bboxes_single, we reshape the color prediction tensors, apply sigmoid or softmax (depending on the loss we use), filter bounding boxes, and predict color for each bounding box. After that, we pass bounding boxes to the method_bbox_post_process where we perform non-maximum suppression (NMS):
def _get_bboxes_single(self,
                       cls_score_list,
                       bbox_pred_list,
                       col_score_list,
                       score_factor_list,
                       mlvl_priors,
                       img_meta,
                       cfg,
                       rescale=False,
                       with_nms=True,
                       **kwargs):
    ...
    mlvl_colors = []
    zipped = zip(cls_score_list, bbox_pred_list, col_score_list,
                    score_factor_list, mlvl_priors)
    for level_idx, (cls_score, bbox_pred, col_score,
                    score_factor, priors) in enumerate(zipped):
        ...
        col_score = col_score.permute(1, 2,
                                    0).reshape(-1, self.col_out_channels)
        if self.use_sigmoid_col:
            scores_col = col_score.sigmoid()
        else:
            scores_col = col_score.softmax(-1)[:, :-1]
        ...
        results = filter_scores_and_topk(
            scores, cfg.score_thr, nms_pre,
            dict(bbox_pred=bbox_pred, priors=priors))
        scores, labels, keep_idxs, filtered_results = results

        labels_col = scores_col[keep_idxs].argmax(dim=1)
        ...
        mlvl_colors.append(labels_col)
    ...
    return self._bbox_post_process(mlvl_scores, mlvl_labels, mlvl_bboxes,
                                   mlvl_colors, img_meta['scale_factor'],
                                   cfg, rescale, with_nms,
                                   mlvl_score_factors, **kwargs)Code language: PHP (php)
As we already mentioned earlier, in the method _bbox_post_process, we join bounding box predictions across all feature levels, perform the MMDetection NMS, and return filtered bounding boxes together with the color predictions:
<strong>def</strong> <strong>_bbox_post_process</strong>(self,
                       mlvl_scores,
                       mlvl_labels,
                       mlvl_bboxes,
                       mlvl_colors,
                       scale_factor,
                       cfg,
                       rescale<strong>=</strong>False,
                       with_nms<strong>=</strong>True,
                       mlvl_score_factors<strong>=</strong>None,
                       <strong>**</strong>kwargs):
    <strong>...</strong>
    mlvl_colors <strong>=</strong> torch<strong>.</strong>cat(mlvl_colors)
    <strong>...</strong>
    <strong>if</strong> with_nms:
        <strong>...</strong>
        det_bboxes, keep_idxs <strong>=</strong> batched_nms(mlvl_bboxes, mlvl_scores,
                                            mlvl_labels, cfg<strong>.</strong>nms)
        <strong>...</strong>
        det_colors <strong>=</strong> mlvl_colors[keep_idxs][:cfg<strong>.</strong>max_per_img]
        <strong>return</strong> det_bboxes, det_labels, det_colorsCode language: HTML, XML (xml)
Tensors that we return in the previous function are passed to the simple_test method of the model class we described earlier in this tutorial.
The last feature of the MMDetection framework we want to adapt for our custom task is the calculation of metrics. This is important, because we want to know how our model performs during training, and also to save checkpoints with respect to the custom task metric.
To implement the new metric, we have to modify the evaluate method of the dataset class. Here, we consider the new output format we described earlier, and we implement a new metric in the evaluate_color method.
def evaluate(self, ...):
    ...
    bbox_results, color_results = list(map(list, zip(*results)))
    ...
    eval_results = self.evaluate_det_segm(bbox_results, result_files,
                                          coco_gt, metrics, logger,
                                          classwise, proposal_nums,
                                          iou_thrs, metric_items)
    if color_results[0]["det_colors"].size > 0:
        color_accuracy = self.evaluate_color(color_results, coco_gt,
                                             logger)
        eval_results.update(color_accuracy)
    ...
    return eval_resultsCode language: PHP (php)
In the evaluate_color method, we implemented the color accuracy for the positively matched bounding boxes. For the bounding box matching, we used the Hungarian matching algorithm.
def evaluate_color(self, results, coco_gt, logger):
    ...
    filenames = []
    for image in coco_gt.dataset["images"]:
        filenames.append(image["file_name"])

    gt_anns = parse_annotations(coco_gt.dataset)

    pred_col = []
    gt_col = []
    for filename, result in zip(filenames, results):
        gt_boxes, gt_colors = list(map(list, zip(*gt_anns[filename])))
        gt_boxes = np.array(gt_boxes)
        ious = pairwise_ious(gt_boxes, result["det_bboxes"][:, :4])
        matched_gt, matched_pred = linear_sum_assignment(ious)

        color_res = result["det_colors"].tolist()
        pred_col.extend([color_res[x] for x in matched_pred.tolist()])
        gt_col.extend([gt_colors[x] for x in matched_gt.tolist()])

    pred_col = np.array(pred_col)
    gt_col = np.array(gt_col)
    accuracy = (pred_col == gt_col).mean()
    ...

return dict(color_acc=accuracy)Code language: PHP (php)In this blog post, we presented the step-by-step implementation of an additional prediction stream in the detection head of the YOLOF model, responsible for predicting colors of the detected instances. We customized several MMDetection classes, such as the dataset class, pipeline classes, YOLOF model class and YOLOF head class. If you are interested in further investigation of this topic or want to try implementing your own customized MMDetection task, you can find the code in our repository.
Feel free to contact us if you need a customized ML model for any of your business purposes.
Partner with us to develop an AI solution specifically tailored to your business.
Contact us